Build Test Steps for Load Test with SoapUI
How to build Test Steps for a load test with SoapUI?
✍: FYIcenter.com
![]() To perform a load test, you need to build test steps
in same way as normal SoapUI test project as shown in this tutorial.
To perform a load test, you need to build test steps
in same way as normal SoapUI test project as shown in this tutorial.
1. Start SoapUI on your computer.
2. Click on "File > Create Empty Project" menu. You see a new project "Project 1" created.
3. Right-click on "Project 1" in left panel and select "New TestSuite". You see a new test suite "TestSuite 1" added.
4. Right-click on "TestSuite 1" in the left panel and select "New TestCase". You see a new test case "TestCase 1" added.
5. Right-click on "Test Steps" under "Test Case 1" in the left panel and select "Add Step > HTTP Request". You see the "New HTTP Request Step" dialog box.
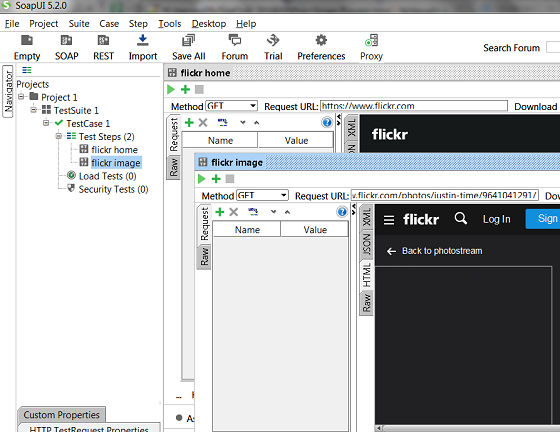
6. Enter "flickr home" as the step name and "https://www.flickr.com" in the "Endpoint" field. The click "OK". You see "flickr home" step added.
7. Right-click on "Test Steps" under "Test Case 1" in the left panel and select "Add Step > HTTP Request".
8. Enter "flickr image" as the step name and "https://www.flickr.com/photos/hilberer/3997537815//" in the "Endpoint" field. The click "OK". You see "flickr home" step added.
9. Run both requests to make sure they are working.
10. Click "File > Save All Projects" menu and save it as "\fyicenter\Flickr-project.xml".
The picture below shows you how to Build Test Steps for a Load Test in SoapUI:
⇒ Create Load Test with SoapUI
⇐ Performing Load Tests with SoapUI
2018-03-10, ∼1969🔥, 0💬
Related Topics: