background image
<< Generate a Use Case Report? | SoDA Templates >>
Working with SoDA
<< Generate a Use Case Report? | SoDA Templates >>
106
Chapter 8 - Communicating Project Status
2
View the entire template by doing one of the following from the Word toolbar:
Click
. If your tool bar does not contain a Show/Hide button (
), add it
in Word.
Or, click Tools > Options. On the View tab, under Formatting marks (Word 2000 or
later) or Nonprinting Characters (Word 97), select the All check box. Click OK.
Pink and yellow Word annotations used by SoDA appear in the document to store
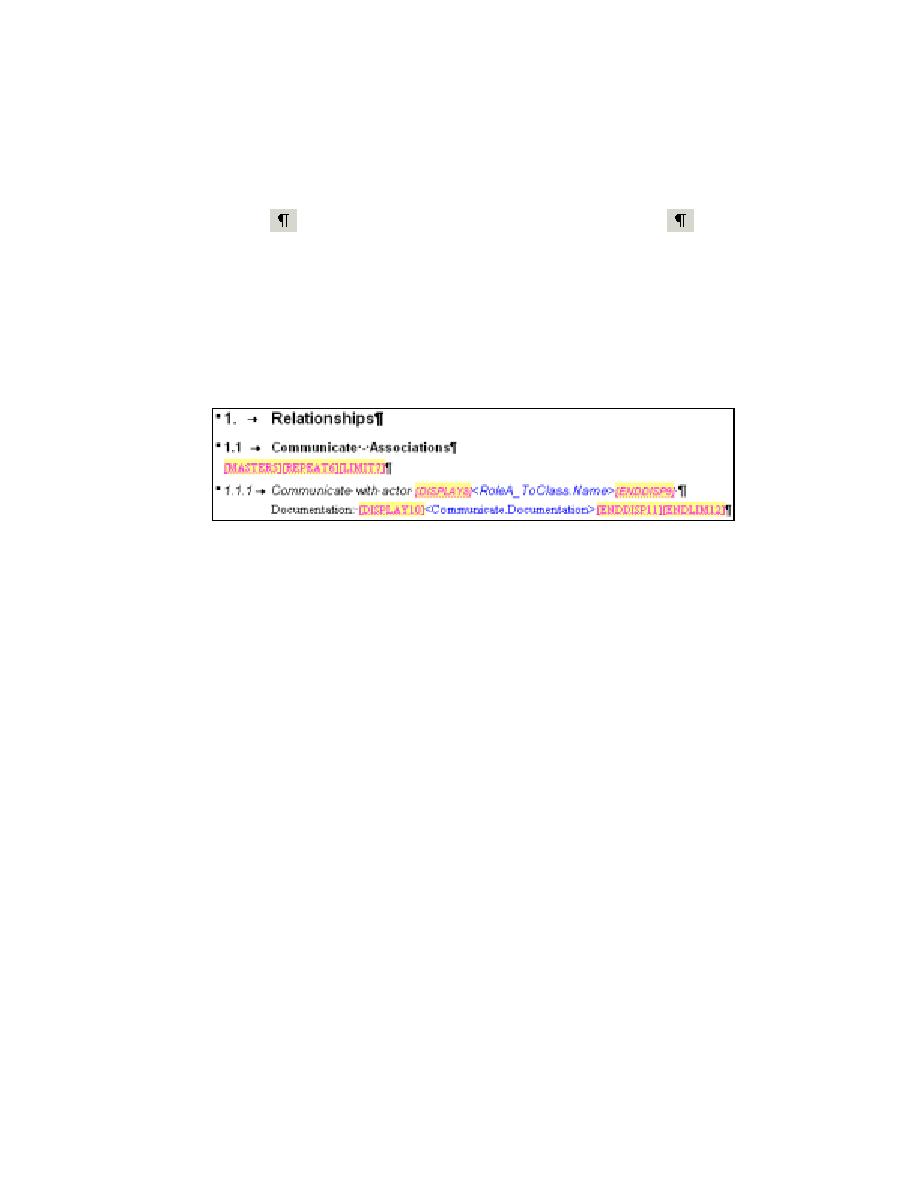
the SoDA commands (see Figure 31). It is important to see this hidden text when
working with SoDA for Word.
Figure 31
Viewing the Use Case Report Template Using SoDA (Excerpt)
Note:
When working with SoDA, you should always have the Show/Hide
function turned on to display all hidden text. If you prefer not to see all formatting
marks when you work with Word outside of SoDA, remember to reset this option
later.
3
Click SoDA > Generate Report.
Word closes and SoDA displays the Progress Indicator while retrieving the use
case document related information from the Rose model you worked with earlier.
This process may take a few moments. Then, SoDA for Word displays the report.
4
Browse through the report and go to page 4 to see the requirements you worked
on in Chapter 5, Creating Requirements. Go to page 6 of the report to see the visual
model you worked with in Chapter 7, Modeling the Enhancement.