<< Bitmap Tool - How to create a mask that includes selected areas | Bitmap Tool -How to apply a mask >>
Bitmap Tool - user-created mask
<< Bitmap Tool - How to create a mask that includes selected areas | Bitmap Tool -How to apply a mask >>
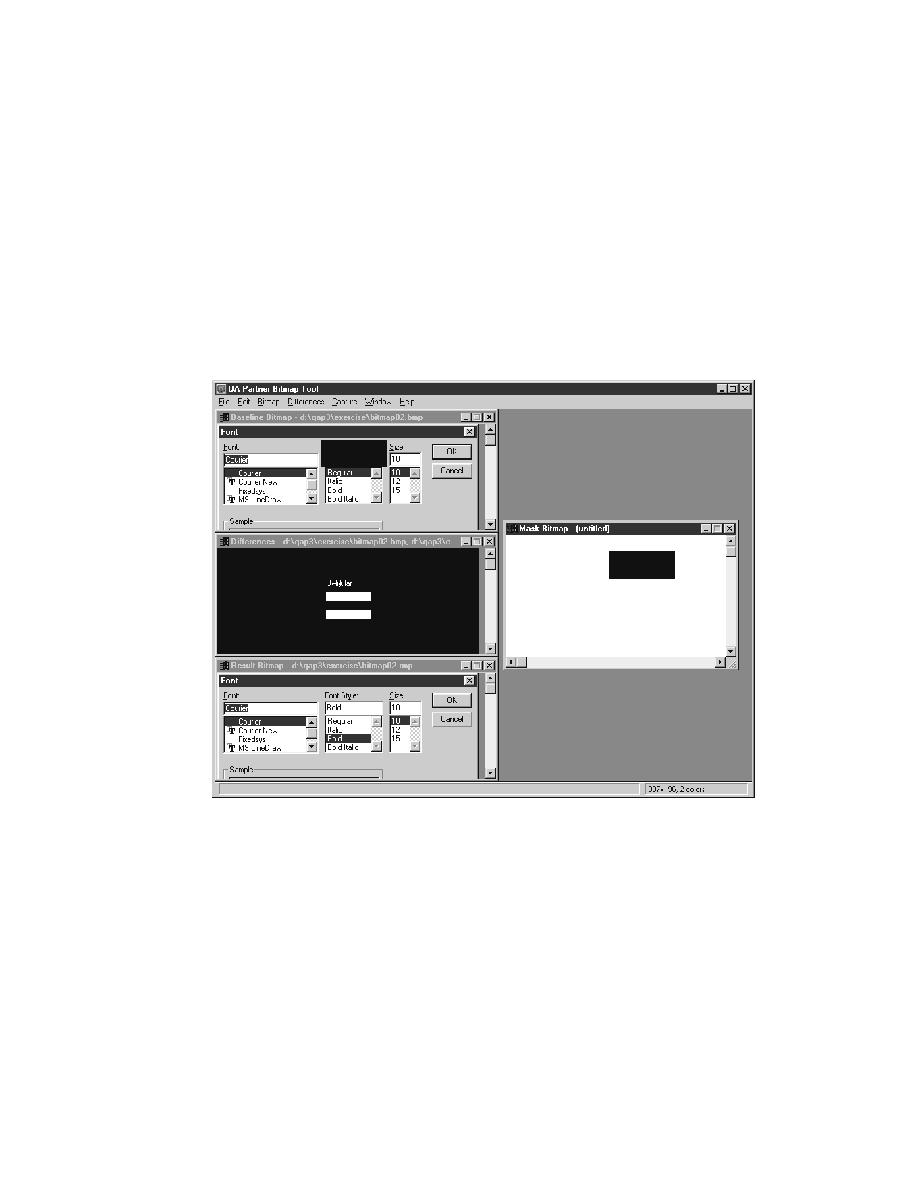
mouse cursor in the baseline bitmap window at the position where you
want to begin creating the mask. As you press and hold the left mouse
button, drag the mouse cursor to outline a rectangle. Then release the left
mouse button.
baseline bitmap of the Font dialog. Note that the rectangular outline in
the baseline map changes to a filled-in rectangle. The mask bitmap
window also contains a like-sized rectangle in the same relative location.
baseline bitmap window at the position where you want to begin editing.
While pressing the Shift key and then the left mouse button, drag the
mouse cursor over the area of the existing map that you want to delete,
and then release the Shift key and the left mouse button.
both the baseline and mask bitmap window.