Creating a Test Verification Point Using TestManager and Robot
Recording the Script
127
6
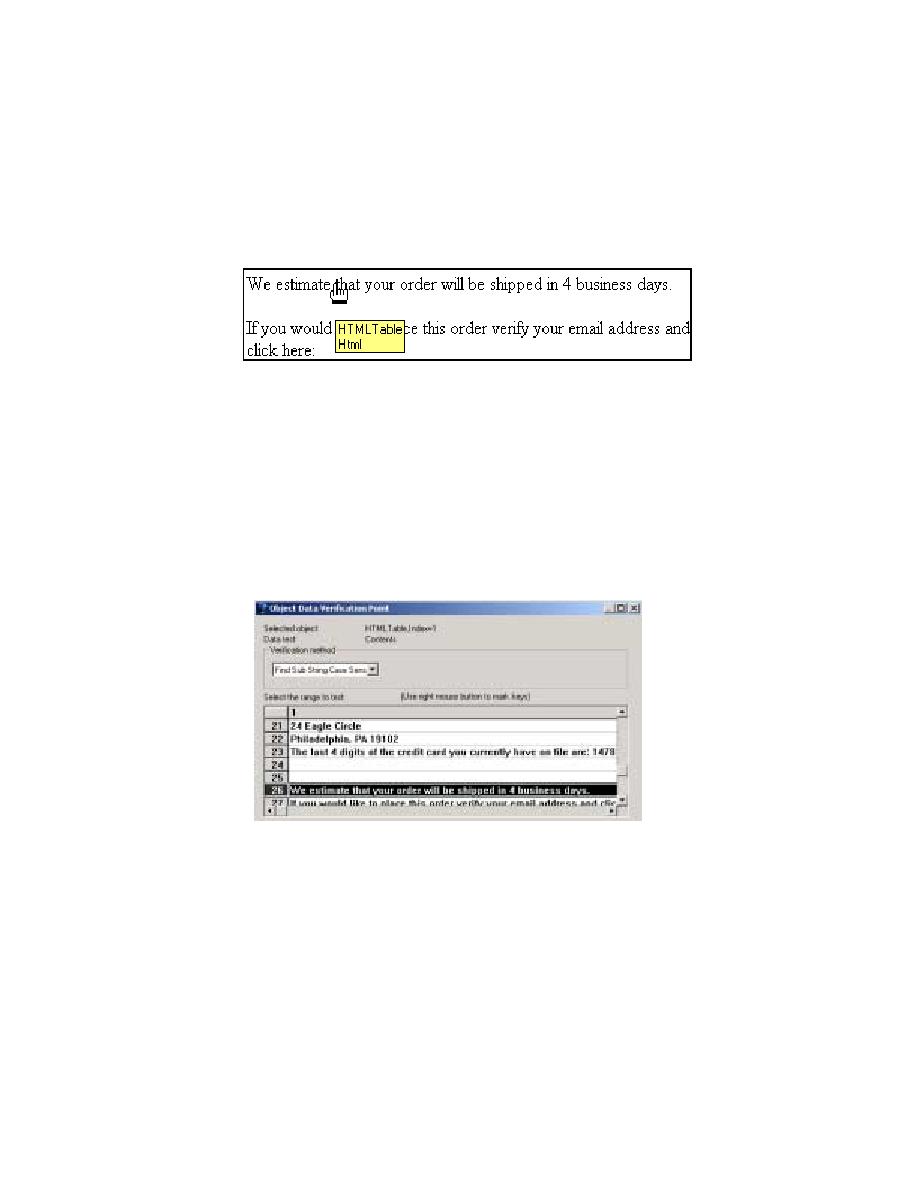
Move the hand pointer to the line on the Checkout page that starts:
We estimate
that your order...
Figure 40
Creating a Test Verification Point Using TestManager and Robot
7
The Object Data Tests dialog box appears, indicating that you have captured the
Contents
of the HTML table. Click OK to view the captured text.
8
On the Object Data Verification Point dialog box:
a
From the Verification method list, click Find Sub String Case Sensitive.
b
Under Select the range to test, scroll to line 26 (
We estimate that...
), then click
c
Click OK to close the dialog box.
Figure 41
Working with Test Verification Points Using TestManager
You have now created a verification point and you have almost finished recording
this test script. The next time this script runs, it will verify that the text you captured is
still displayed. You can include any number of verification points in a script. This
script has only one.