background image
<< GMO Database files | Setting Up the Runtime Environment >>

Creating a New Project

<< GMO Database files | Setting Up the Runtime Environment >>
Getting Started: A Tutorial
39
2 P
REPARING
TO
U
SE
THIS
T
UTORIAL
Setting Up to Test Client/Server Applications
Creating a GMO
Project
Let's create a project for use in this tutorial.
1
Open SilkTest and make sure the Basic Workflow is enabled. When the
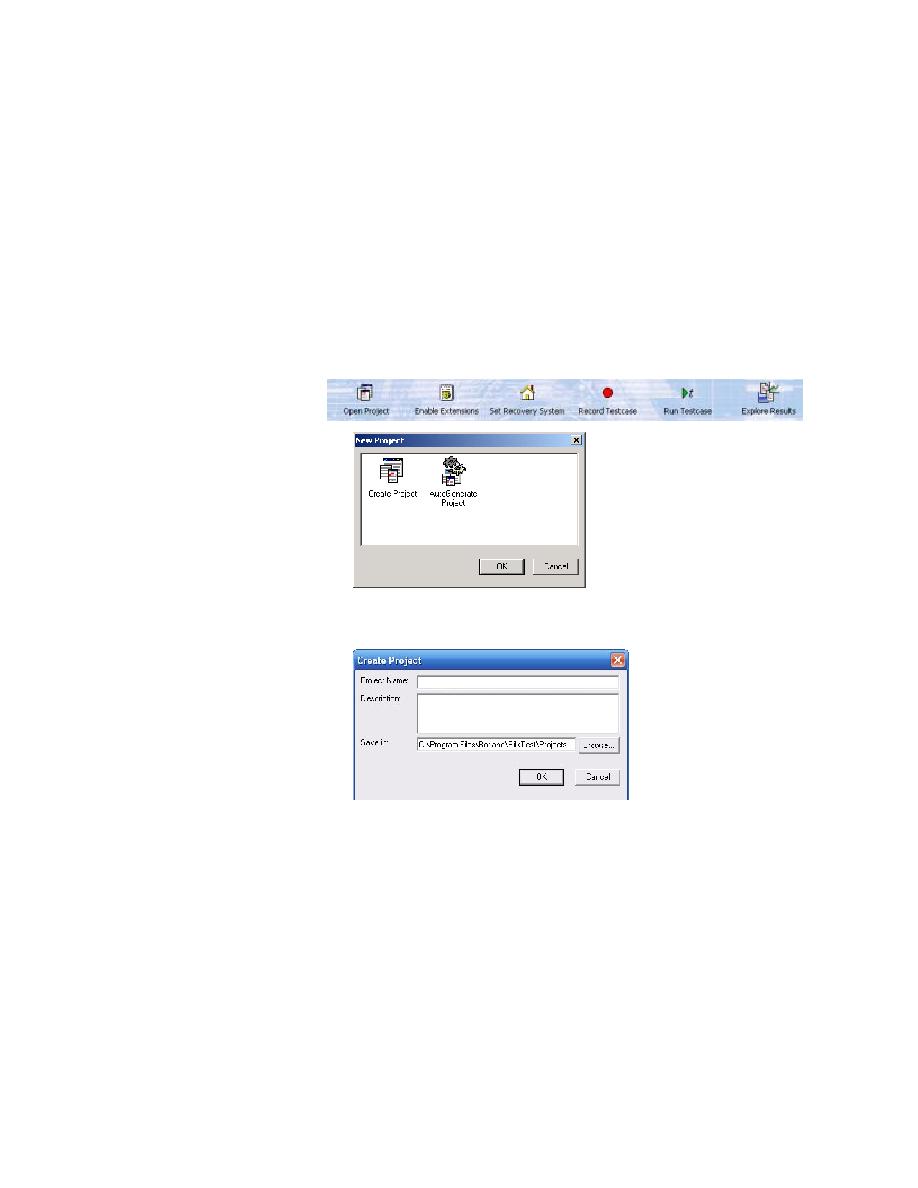
Basic Workflow is enabled, the following workflow bar appears. If you
do not see the Basic Workflow bar, click Workflows/Basic and select
Basic.
2
On the Basic Workflow bar, click Open Project/New Project.
3
On the New Project dialog, double click Create Project.
4
On the Create Project dialog, type GMO as the Project Name and type
Test of the GMO Application as the Description.
5
Click OK to save your project in the default location, <SilkTest
installation directory
>/Project. If you already have a project open, click
OK to close the open project and create the GMO project.
SilkTest will create a projectname folder within this directory, save the
projectname.vtp and projectname.ini to this location and copy the
extension .ini files to a projectname/extend subdirectory. If you do not
want to save your project in the default location, click Browse and
specify the folder in which you want to save your project.