Close dialog box
Tasks Associated with Creating a Verification Point
4-11
2. In the Verification Point Name dialog box, type a name and click OK to open the
Select Object dialog box.
3. Do one of the following:
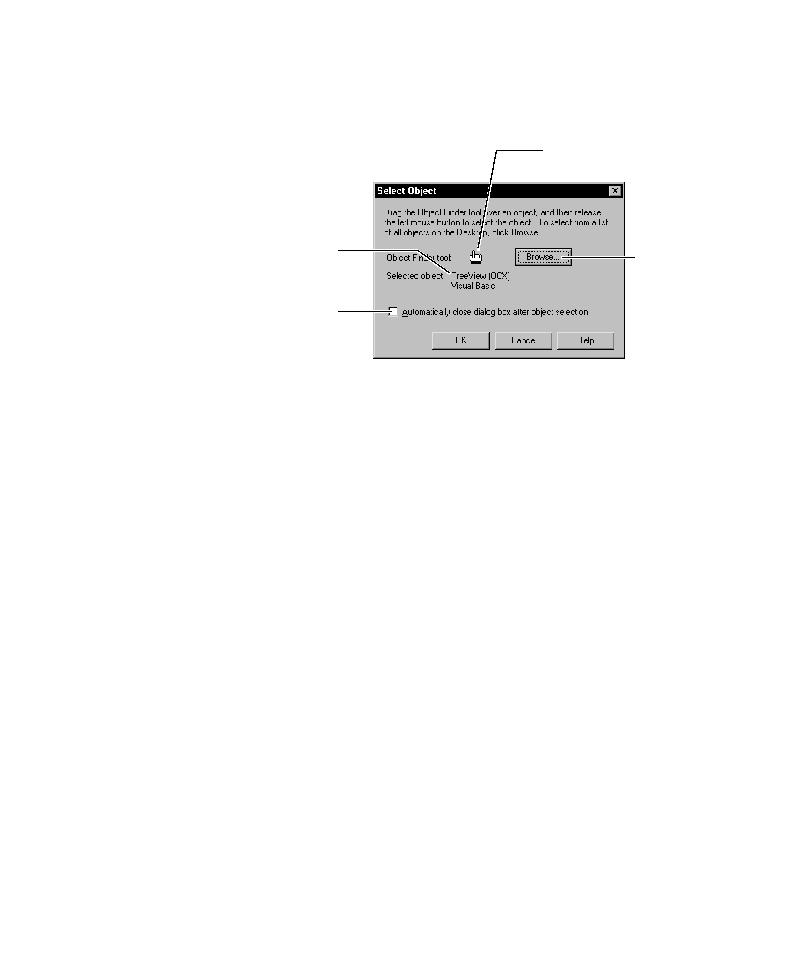
Select Automatically close dialog box after object selection to have the
Select Object dialog box close after you select the object to test.
Clear Automatically close dialog box after object selection to have the
Select Object dialog box reappear after you select the object to test. You will
need to click OK to close the dialog box.
To select a visible object directly from the application, continue with step 4.
To select an object from a list of all objects on the desktop, skip to step 5.
4. To select a visible object directly from the application, drag the Object Finder
tool over the object and release the mouse button.
When you drag the Object Finder tool, the Select Object dialog box disappears.
When you release the mouse button, the Select Object dialog box reappears if
you have cleared the Automatically close dialog box after object selection
check box.
As you move the Object Finder tool over an object, the object type appears in a
yellow TestTip. (For information about how to identify the object to test, see
the next section, Identifying the Object to Test.)
Drag over an object and
release the mouse button.
Shows the type after
you select an object.
Select to have the
dialog box close after
you select an object.
Click to select
from a list of all
objects on the
desktop.