Understanding XML Checkpoint Results Window
they relate specifically to the XML Checkpoint, the XML Viewer and the different options available in
the XML Viewer.
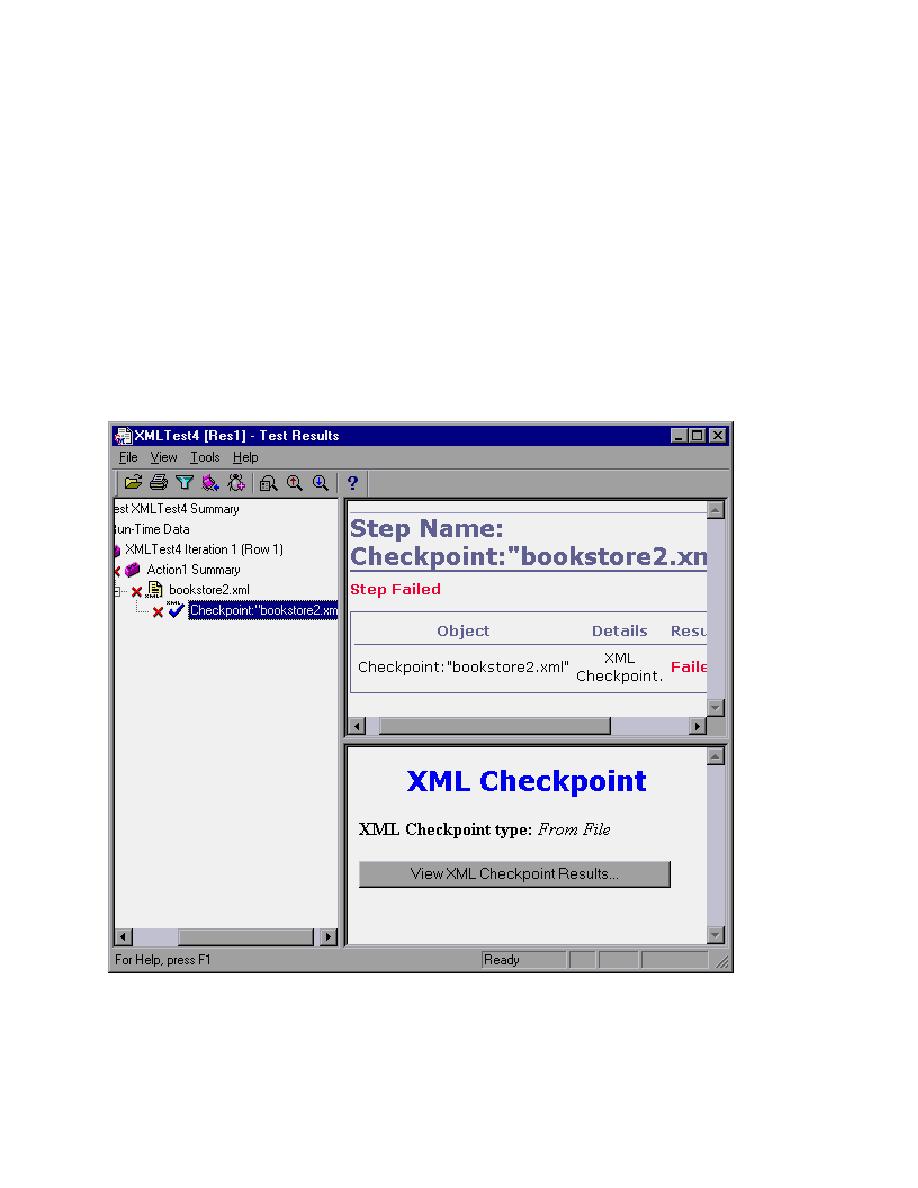
displayed in the Tree Pane with a pass or fail check. Upon selecting the XML Checkpoint entry in the
tree, the summary pane will update with the basic status information. The detail pane below it will now
have a button to invoke the XML Viewer in order to see the details about the XML file and what caused
the failure.
"always" for the "Save step screen capture to test results" setting in the Options window > Run tab.
Should you want to see the expected results, then return to the the QuickTest Test Script, select the
checkpoint and view its properties.